
What truly sets animated GIFs apart is the smooth transitions and animations between states, one can showcase. This enhances the digital experience for a user. A use case can be scripted or merely a simple mobile app turning on. The only drawback is the quality, length of animation and the size of file. In this third part of our tutorial, I will shared what effects I used to get my animated GIF of a mobile weather app. The first tutorial was on the full overall process and the second tutorial is on exporting into optimized GIFs.
This animation is relatively simple compared to the stuff out there and my reference was the amazing work of Fede Cook
Let’s first break down the animation
- Three boxes flow down the screen
- One box of full width goes up
- Weather information appears on the boxes
- A cloud icon appears dropping what seems to be snow
- The word snowy appears
The three amigos
The boxes are created as shape layers which have properties like scale, position, opacity, stroke etc. After Effects allows for control of these properties over time. And that is how animations are achieved. This is called Keyframing. For a good tutorial intro on keyframing watch the video below
Process
I focused on creating the animation of one box layer first. In the first frame I have a the box invisible due to its scale not opacity but its width is already defined. This way, when you increase the height, it fills out as a rectangle. I have a keyframe for the filled out rectangle and then, as if driven by gravity the rectangle falls and squashes into a square at the bottom. Hence there is another keyframe at the bottom with different scale and position.

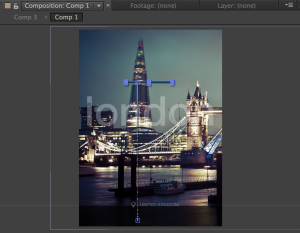
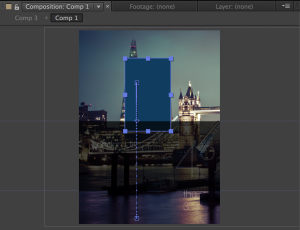
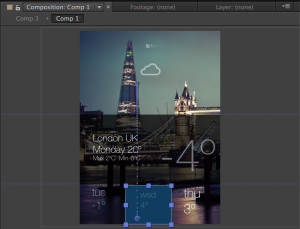
What is important for this animation is that you make it as smooth as possible. Therefore by selecting the position keyframes and right clicking on them, you should add Easy Ease from the Keyframe Assistant. This makes it smoother.
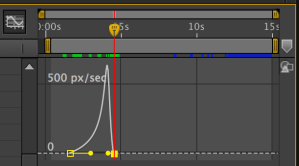
To emphasize this motion even further we add a realistic acceleration of the object by select the position keyframes and then clicking on the Graph Editor. This will initially show a simple curve of acceleration with its fastest point in the middle. We adjust the accelaration to happen at the end by skewing the graph to the right; meaning it will accelerate faster towards the end then suddenly slow down into position.
For more practice on slick transitions
Duplicate the box layer and adjust when the keyframes kick in, in order to have them happen one after the other.
The fourth shape, is mere a box of color black but with its opacity reduced to make it transparent so we can see the lovely background. The animation on this is a Position keyframe from off-screen to on-screen.
Text animation
After effects offers its own effects that you can apply on any text layer. One can also create their own effects using a combination of motion and visibility.
Today’s temperature: Combination of opacity and position keyframes
Forecast temperatures: Combination of scale and opacity keyframes
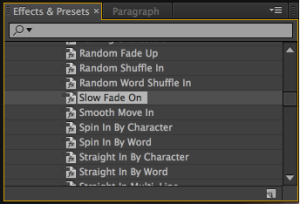
Snowy text: Under the Effects and Presets window > Animation Presets > Text > Slow fade on
The cloud and circles are a combination of opacity, scaling up and position. Easy Ease effect is applied onto the position keyframes for a more smoother transition.
Final product

How to create animated GIFs for UI design presentations: Part 2
How to create animated GIFs for UI design presentations: Part 1
I realize not everyone has After Effects and might want to create animations much quicker so I created a tutorial which uses Invision instead of After Effects for those of a tighter budget. Creating animated GIFs using Invision and Photoshop.
If you enjoyed this article please like, follow or comment my blog. I would appreciate any feedback from special people like you. 😉
Discover more from UX Design Mastery
Subscribe to get the latest posts sent to your email.





Hello to every one, it’s genuinely a nice for me to pay a
quick visit this website, it consists of precious Information.
Sorry but I have some issues opening the WeatherApp.aep in CS6 Version 11. it only can be opend in 12.2.1
So sad 🙁